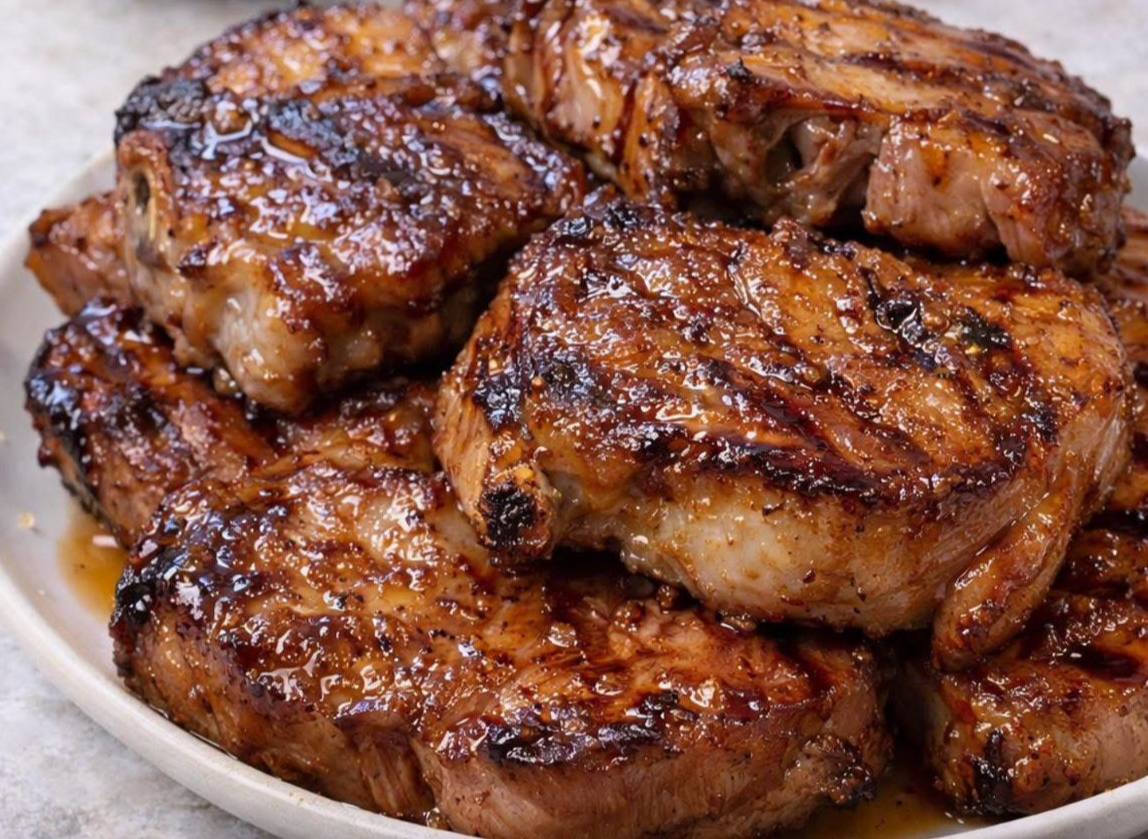
Instructions
- Prepare the Ribs: Start by patting the ribs dry with paper towels. This helps the rub adhere better. On the underside of each rib rack, locate the thin, papery membrane (silverskin). Using a small knife or the handle of a spoon, carefully lift a corner of the membrane. Once you have a good grip, use a paper towel to help pull the membrane off in one continuous piece. This step is crucial for tender, fall-off-the-bone ribs.
- Make the Dry Rub: In a small bowl, combine the kosher salt, smoked paprika, brown sugar, garlic powder, onion powder, black pepper, and cayenne pepper (if using). Mix well to ensure all ingredients are evenly distributed.
- Apply the Dry Rub: Generously sprinkle the dry rub all over both sides of the rib racks. Using your hands, massage the rub into the meat, ensuring every crevice is covered. Don’t be shy – the rub is the foundation of flavor!
- Prepare for Baking: Preheat your oven to 275°F (135°C). Tear off two large sheets of heavy-duty aluminum foil for each rack of ribs. Lay one sheet down, place a rib rack meat-side up in the center, then place the second sheet over it. Tightly seal the edges of the foil around the ribs, creating a secure packet. This traps moisture and steams the ribs, ensuring maximum tenderness. Repeat for the second rack.
- Slow Bake: Place the foil-wrapped rib packets directly on a baking sheet. Transfer the baking sheet to the preheated oven and bake for 2.5 to 3 hours for baby back ribs, or 3 to 3.5 hours for spare ribs. The goal is for the meat to be very tender, but not completely falling off the bone yet.
- Prepare the Glaze: While the ribs are baking, prepare your BBQ glaze. In a medium saucepan, combine your favorite BBQ sauce, apple cider vinegar, Worcestershire sauce, and Dijon mustard. Bring the mixture to a gentle simmer over medium-low heat, stirring occasionally. Let it simmer for about 5-10 minutes, allowing the flavors to meld and the sauce to thicken slightly. Remove from heat and set aside.
- Unwrap and Glaze: After the initial baking time, carefully remove the baking sheet from the oven. Open the foil packets (be cautious of hot steam!). Carefully drain any accumulated liquid from the foil packets.
- Increase Oven Temperature: Increase the oven temperature to 375°F (190°C).
- Apply First Layer of Glaze: Generously brush the ribs all over with a thick layer of your prepared BBQ glaze.
- Return to Oven: Place the glazed ribs directly on the baking sheet (discard the foil, or use a fresh sheet of foil if you prefer less cleanup, but ensure the ribs are not wrapped). Return to the oven and bake for another 15-20 minutes, or until the glaze is sticky and slightly caramelized, and the ribs are tender.
- Final Glaze and Broil (Optional): For an extra sticky and slightly charred finish, remove the ribs from the oven. Apply one more generous layer of BBQ glaze. If desired, switch your oven to the broiler setting (keep a close eye on them!). Broil for 2-4 minutes, watching carefully to prevent burning, until the glaze is bubbling and slightly caramelized in spots.
- Rest and Serve: Once done, remove the ribs from the oven and let them rest on a cutting board for 5-10 minutes. This allows the juices to redistribute, resulting in even more tender and flavorful ribs. Slice between the bones and serve immediately.
Cooking Tips and Variations
Choosing the Right Ribs: For this recipe, both baby back ribs and spare ribs work beautifully. Baby back ribs are leaner, more tender, and cook a bit faster, typically coming from the loin section. Spare ribs are meatier, fattier, and more flavorful, cut from the belly section, and take a little longer to cook. Both will yield delicious results, so choose based on your preference for meatiness and cooking time.
The Importance of the Dry Rub: Don’t skip or skimp on the dry rub! It’s the flavor foundation of your ribs. A good rub penetrates the meat, adding depth and complexity that a sauce alone cannot provide. Feel free to customize your rub with additional spices like mustard powder, celery salt, or even a touch of espresso powder for a unique twist.
Achieving Tenderness (Low and Slow is Key): The secret to truly fall-off-the-bone ribs is the “low and slow” cooking method. Baking at a low temperature for an extended period breaks down the tough connective tissues in the ribs, rendering them incredibly tender. Resist the urge to rush this step; patience is rewarded with perfection.
Foil Wrapping for Moisture: Wrapping the ribs tightly in foil during the initial baking phase creates a steamy environment, ensuring the ribs remain moist and tender. It’s like a pressure cooker effect, helping to break down the meat without drying it out.
Getting that Perfect Glaze: The final glazing step is where the magic happens. Applying the BBQ sauce towards the end of cooking, and then allowing it to caramelize in the oven (or under the broiler), creates that irresistible sticky, glossy, and slightly charred crust. Don’t be afraid to apply multiple thin layers for a deeper, richer glaze.
Rest Before Serving: Just like with any cooked meat, allowing the ribs to rest for 5-10 minutes after they come out of the oven is crucial. This helps the juices redistribute throughout the meat, resulting in a more succulent and flavorful bite.
Flavor Variations:
- Spicy Ribs: Add extra cayenne pepper to your dry rub, or a dash of hot sauce to your BBQ glaze for a fiery kick.
- Smoky Ribs: Incorporate liquid smoke (a few drops) into your dry rub or BBQ sauce for an authentic smoky flavor without a smoker.
- Asian-Inspired Ribs: Swap out the traditional BBQ sauce for a glaze made with soy sauce, honey, ginger, garlic, and a touch of sesame oil.
- Herbaceous Ribs: Add dried rosemary, thyme, or oregano to your dry rub for an aromatic twist.
Storage and Reheating
Storage: Leftover oven-baked BBQ ribs can be stored in an airtight container in the refrigerator for up to 3-4 days. To maximize freshness and prevent drying out, you can store them with a little extra BBQ sauce. For longer storage, ribs can be frozen for up to 2-3 months. Wrap individual portions tightly in plastic wrap, then place them in a freezer-safe bag or container.
Reheating:
- Oven: This is the best method for reheating ribs, as it helps maintain their tenderness and texture. Preheat your oven to 250-300°F (120-150°C). Place the ribs in an oven-safe dish, add a tablespoon or two of water or extra BBQ sauce to the bottom of the dish, and cover tightly with foil. Heat for 20-30 minutes, or until heated through.
- Microwave: While convenient, the microwave can sometimes make ribs tough or chewy. If using, place ribs on a microwave-safe plate, add a splash of water, and cover with a damp paper towel. Heat in 1-minute intervals until warm, flipping halfway through.
- Grill: If you have a grill, you can reheat ribs over medium-low heat. Wrap them in foil with a little sauce or water to prevent drying. Heat for 10-15 minutes, flipping occasionally, until warmed through. You can finish them unwrapped for a few minutes to crisp up the glaze.
Frequently Asked Questions
Do I really need to remove the membrane from the ribs?
Yes, absolutely! Removing the membrane (silverskin) from the back of the ribs is a crucial step for achieving truly tender ribs. If left on, the membrane becomes tough and chewy, preventing the meat from absorbing flavors and becoming fall-off-the-bone tender. It’s a quick step that makes a significant difference in the final texture of your ribs.
Can I prepare the ribs ahead of time?
You can certainly prepare the ribs in advance! After applying the dry rub, you can wrap them tightly in plastic wrap and refrigerate them for at least 4 hours, or even overnight (up to 24 hours). This allows the flavors of the rub to penetrate deeply into the meat. Then, simply proceed with the baking instructions when you’re ready to cook.
My ribs aren’t as tender as I’d like. What went wrong?
The most common reason for tough ribs is not cooking them long enough at a low temperature. Tenderness comes from the “low and slow” cooking process, which breaks down the connective tissues. If your ribs aren’t tender, simply put them back in the oven, wrapped in foil, at 275°F (135°C) for another 30-60 minutes, or until they reach your desired tenderness. Ribs are often judged by feel rather than a specific internal temperature for doneness.
Can I use a different kind of BBQ sauce?
Absolutely! The beauty of this recipe is its versatility. While we provide a base for a delicious glaze, feel free to use your favorite store-bought BBQ sauce or even create your own from scratch. Experiment with different flavor profiles – smoky, sweet, tangy, or spicy – to customize the ribs to your exact preference. Just ensure it’s a sauce you genuinely enjoy!